Bosses
Varg the Bonelord, the Elder Treant, the Deep One, Ashwing, the Barrow King, Rimeclaw, the Tide Serpent, the Pitlord, the Emberwraith, the Hag Coven, the Elder Stag and the Kraken: how to beat them.
Bosses hit hard, have huge health pools and special attacks. Your first kill of a boss always drops at least a Rare. Each also has a tiny chance of a legendary unique.
Varg the Bonelord
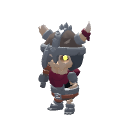
Varg the Bonelord, level 18, waits in the deepest chamber of the Hollow Cave.
- Stamp: every 6 seconds he hits everything next to him for 1.4× damage. Ranged vocations: stay at range.
- Enrage: below half health he attacks faster. Save Battle Cry, Piercing Shot or Meteor for this moment.
- Drops: a rare weapon (Steel Sword, Longbow or Bone Staff), the Bonelord's Crown, and Varg's Cleaver (legendary).
- Quest: The Bonelord.
The Elder Treant
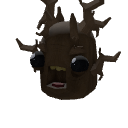
The Elder Treant, level 16, lives in the far north-west grove of Fernwood. It is slow but stamps the ground around it every 7 seconds. Kite it.
- Drops: Heartwood, rare Frost Staff, Yew Bow or Steel Longsword, and the Heartwood Staff (legendary).
- Quest: The Elder Treant.
The Deep One
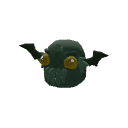
The Deep One, level 22, lurks in the flooded hall of the Deep Mines. It casts from 4 tiles away and poisons heavily. Bring antidotes.
- Drops: Void Pearls, rare Storm Staff, Heavy Crossbow or Tower Shield, the Abyssal Bow and the Amulet of the Deep (both legendary).
- Quest: The Flooded Hall.
Ashwing the Dragon
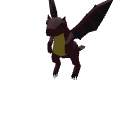
Ashwing, level 28, has 1,400 HP. She nests beyond the lava moat in the far south-east of the Scorched Vale; cross by the plank bridge.
- Stamp: every 6 seconds, hitting everything within 2 tiles.
- Fire breath: if you stay out of reach she breathes fire at you from up to 5 tiles. It's magic, so armour helps less.
- Burns (poison) on hit.
- Enrages below 40% health.
- Drops: a Dragon Heart and drake scales, plus four hoard items: Obsidian Axe, Dragonbone Bow, Demon Wand, Dragon Shield. The legendaries are Ashwing's Fang and the Dragonheart Ring.
- Quest: Ashwing.
The Barrow King
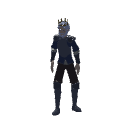
The Barrow King, level 30, sits on his throne on the third floor of the Barrow under Highmoor.
- Grave slam: every 7 seconds he hits everything within 2 tiles for 1.5× damage. Step out of range when it's coming.
- Enrage: below half health he attacks about twice as fast.
- Legendaries: Kingsbane, Crown of the Barrow, Wightbow and Sceptre of Bones.
Rimeclaw
Rimeclaw, level 30, sleeps in the ice cave at the top of Frostfang Pass.
- Ice slam: every 7 seconds it hits everything within 2 tiles for 1.5× damage.
- Frost breath from up to 5 tiles if you keep your distance.
- Its bite can slow you, so keep potions to hand.
- Enrage: below half health it attacks much faster.
- Legendaries: Rimebite, Frostfang Pendant and Winter's Breath.
The Tide Serpent
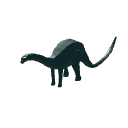
The Tide Serpent, level 36, lies coiled in the drowned sanctum at the back of the Sunken Temple on Gullwrack Isle.
- It attacks with magic from 3 tiles, which goes half through armour, and can slow you.
- Tide slam: every 7 seconds it hits everything within 2 tiles for 1.5× damage.
- Enrage: below half health it attacks much faster.
- It always drops a Tide Serpent Scale and temple relics. Legendaries: Tidefang, Scale of the Deep and Tidecaller.
The Pitlord
The Pitlord is wave 12 of the Proving Pit. He slams within 2 tiles and enrages at half health, and he drops nothing. Beating him clears the Pit, and the first time you do, you get the Pitlord's Torc. Falling to him costs nothing, so learn the fight.
The Emberwraith
The Emberwraith, level 36, is the end of The Waking. It waits in the Ember Heart, behind the Ember Gate at the north end of the Cinder Keep. The gate opens once you finish chapter 9.
- It casts from three tiles away and slams everything around it, so you can't hide at range or up close.
- It burns, gets angrier as it weakens, and its magic goes through part of your armour. Bring your best potions.
- Cinder shades guard the cavern. Clear them first.
- Drops: Emberwraith Ash, diamonds, void pearls, hard clue scrolls, and sometimes another Heart of Embers. Finishing the chapter always gives you one.
The Hag Coven
Three hags guard the Coven Circle in Thornwood, level 32, and you fight them together:
- Morwen the Cutter: melee, slams everything around her and enrages when hurt.
- Grizel the Brewer: throws boiling poison from range.
- Ysolde the Binder: hexes that slow you down.
Kill Grizel and Ysolde first; Morwen hits hardest but slowest. Their drops include the Witchwood Staff, the Hagstone Amulet and the Coven Cleaver (all legendary).
The Elder Stag
In the far east of Fernwood, the Stag's Glade (level 16+). The Elder Stag charges and stamps, and enrages at low health. It can drop the Antler Crown. Ranger Cole asks you to free it.
The Kraken
At the western end of Saltmere's strand, Kraken's Reach (level 30+). Its arms reach three tiles, slam a wide area and slow you; its magic gets through some armour. It can drop the Krakenhide Cloak. Harbourmaster Quill pays well for it.
Nerissa, the Drowned Queen
At the end of the Sunken City's Palace of Tides (level 44). She casts from range, slams everything within two tiles and can slow you. Below half health she casts much faster. She can drop one of four legendaries.
The Ashen Regent
On the Throne of Ash at the heart of the Ashen Citadel (level 50): the hardest fight in the game. He hits through armour, slams two tiles round him, and fights faster below 40% health. He can drop one of four legendaries.
Both, like the Barrow King, open a heroic version of their dungeon once beaten.
Captain Blackwake
The smuggler king, in his grotto at the end of the Smugglers' Caves (level 37). He hits hard, slams two tiles round him, fires his pistol at you from up to 6 tiles if you keep away, and fights faster when hurt. He can drop Blackwake's Cutlass, Blackwake's Compass and, rarely, Polly the parrot.
Morvane, the Lich-King
Kingsreach's first king, in his tomb at the head of the Ossuary (level 54). He casts from four tiles away, hits through armour, slams two tiles round him and grows faster below 40% health. He can drop the Crown of Morvane, Lichbane, the Ossuary Longbow, Gravecleaver and, rarely, the Lichling pet.
Skarnveil, the Storm Wyrm
The wyrm at the top of the Shattered Peaks: level 65, lightning from four tiles away, a slam round him and faster below 40% health. Drops Wyrmfang, Skystring, the Heart of the Storm, the Wyrmscale Aegis, the Crown of the Peaks and the rare Stormrunner saddle. Defeating him opens the way to the Riftwastes.
Oraveth, the Veiled Oracle
At the end of the Veiled Sanctum on Mistveil Isle: level 62, water from four tiles away that can slow you, a slam round her and much faster attacks below 40% health. She drops Veilpiercer, the Staff of the Veiled Eye, Mistsong and the Veil of Oraveth, and earns you the title the Mistwalker.
Vaelith, the Unmaker
The final boss, at the Crown of the Unmade Spire in the Riftwastes: level 75, shadow from four tiles away, a slam round her, armour-piercing hits and much faster attacks below 40% health. She drops Unmaker, the Voidheart Staff, Riftsong, the Crown of the Unmade and the Spire Aegis, and earns you the title the Warden.
Boss pets
Every big boss can drop its pet (2% a kill). See Pets and mounts.
Rift guardians
The last floor of every rift has a guardian: Varg, the Deep One or the Barrow King, always as an elite with two traits. Its chest pays far better than its usual drop.
General tips
- Bring plenty of healing: Supreme Health Potions or cooked fish.
- Drink a Strength or Iron Skin potion before you pull.
- Paladins and Wizards: never stand next to a boss. Kite and keep moving.
- On the minimap, bosses and named rares are red stars, so you can see at once whether one is up.
- Bosses respawn, and every kill counts towards their bestiary milestones, which need far fewer kills than normal creatures.
Rare named bosses
Fifteen named monsters only show up now and then. Each has a small chance to appear every few minutes. When one does, a banner and a rumour in the message log tell you, so drop everything and go.
| Boss | Where | Level | Signature drop |
|---|---|---|---|
| Queen Vespa | Fernwood's old grove | 13 | Vespa's Stinger: a chance to strike twice |
| Old Mossbeard | Fernwood's wasp glade | 15 | Sporecrown: faster gathering |
| Captain Redbeard | Rogue's Ridge bandit camp | 18 | Redbeard's Cutlass, and always his map |
| Gorrak the Hill Giant | Rogue's Ridge, the high ridge | 22 | Gorrak's Maul: hits arc to a second foe. He throws rocks if you keep away |
| The Drowned Admiral | Saltmere's wreck, at night | 19 | Admiral's Spyglass: better rare finds |
| Alpaking Rex | Highmoor's west moor | 22 | Rex Fleece: more health |
| Stormwing | Highmoor's storm peak, in the rain | 28 | Stormwing Aegis: thorns and chain lightning. Breathes lightning from range |
| The Yeti Matriarch | Frostfang Pass, at night | 27 | Matriarch's Mantle: more health, thorns |
| Old Gnasher | Gullwrack's beach, at night | 34 | Gnasher's Claw: strike twice, more damage |
| The Pearl Warden | The Sunken City, by the stairs down | 42 | Warden's Pearl: better rare finds |
| Captain Vorr | The Ashen Citadel, by the keep doors | 48 | Vorr's Oath: more damage |
| The Red Corsair | Port Varrow's Brinewood | 30 | Crimson Sash: more damage, faster attacks |
| The Brigand Huntmaster | Kingsreach's King's Woods | 44 | Huntmaster's Cloak: accuracy, more damage |
| The Pale Mantis | Mistveil Isle's Orchid Grove, at night | 62 | Pale Carapace: accuracy, more damage |
| Shardmaw | The Shattered Peaks' Starfall Crater | 58 | Shardheart Amulet: more damage, more health |
| The Riftborn Horror | The Riftwastes, at night | 70 | Horror's Hide: accuracy, more damage |
Like every boss, your first kill of each guarantees at least a Rare find.